Enabling WebRTC: Difference between revisions
Jump to navigation
Jump to search
(Created page with "WebRTC is not enabled by default and you need to follow carefully the following steps to make it work. # Install an SSL certificate on Asterisk. This needs to be a real SSL c...") |
No edit summary |
||
| (6 intermediate revisions by the same user not shown) | |||
| Line 1: | Line 1: | ||
WebRTC is not enabled by default and you need to follow carefully the following steps to make it work. | WebRTC is not enabled by default and you need to follow carefully the following steps to make it work. | ||
* Install an SSL certificate on Asterisk. This needs to be a real SSL certificate. Check the Asterisk [[FAQ]] on how to install an SSL Certificate in Asterisk | |||
* Install the Opus codec and add to the web interface. You can check the instructions in the Setup Guides section [[Installing OPUS codec]] | |||
* Activate the http daemon for asterisk by editing the http.conf file as following: | |||
<pre> | <pre> | ||
| Line 19: | Line 17: | ||
The tlscertfile needs to point to your certificate in pem format | The tlscertfile needs to point to your certificate in pem format | ||
You can provide separate cert and key: | |||
<pre> | |||
tlscertfile=/etc/ssl/demo.mirtapbx.com.crt | |||
tlsprivatekey=/etc/ssl/demo.mirtapbx.com.key | |||
</pre> | |||
It may be needed to set the following parameters in sip.conf too: | |||
<pre> | |||
dtlsenable=yes | |||
dtlsverify=fingerprint | |||
dtlscertfile= | |||
dtlsprivatekey= | |||
</pre> | |||
* Activate the ws and wss transport in sip.conf, set the realm | |||
<pre> | <pre> | ||
transport=udp,tls,ws,wss | transport=udp,tcp,tls,ws,wss | ||
realm=demo.mirtapbx.com | realm=demo.mirtapbx.com | ||
</pre> | </pre> | ||
* Set the path for your certificate in the Web interface - Admin/Settings, Security section, WebRTC SSL path field | |||
* In your extension enable Opus Codec, WebRTC support, RTP Encryption and Any Transport | |||
== Verifying WebRTC == | |||
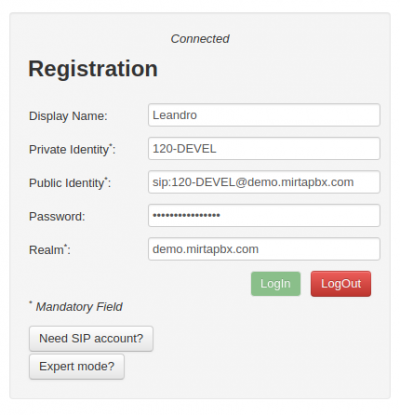
To verify the WebRTC configuration, you can try to register and place calls using the SipML5 by visiting: https://www.doubango.org/sipml5/ | |||
[[File:sipML5.png|400px]] | |||
Latest revision as of 16:31, 1 December 2020
WebRTC is not enabled by default and you need to follow carefully the following steps to make it work.
- Install an SSL certificate on Asterisk. This needs to be a real SSL certificate. Check the Asterisk FAQ on how to install an SSL Certificate in Asterisk
- Install the Opus codec and add to the web interface. You can check the instructions in the Setup Guides section Installing OPUS codec
- Activate the http daemon for asterisk by editing the http.conf file as following:
[general]
enabled=yes
bindaddr=0.0.0.0
bindport=8088
tlsenable=yes
tlsbindaddr=0.0.0.0:8089
tlscertfile=/etc/asterisk/certificates/demo.mirtapbx.com.pem
The tlscertfile needs to point to your certificate in pem format
You can provide separate cert and key:
tlscertfile=/etc/ssl/demo.mirtapbx.com.crt
tlsprivatekey=/etc/ssl/demo.mirtapbx.com.key
It may be needed to set the following parameters in sip.conf too:
dtlsenable=yes
dtlsverify=fingerprint
dtlscertfile=
dtlsprivatekey=
- Activate the ws and wss transport in sip.conf, set the realm
transport=udp,tcp,tls,ws,wss
realm=demo.mirtapbx.com
- Set the path for your certificate in the Web interface - Admin/Settings, Security section, WebRTC SSL path field
- In your extension enable Opus Codec, WebRTC support, RTP Encryption and Any Transport
Verifying WebRTC
To verify the WebRTC configuration, you can try to register and place calls using the SipML5 by visiting: https://www.doubango.org/sipml5/
