Installing SIPTAPI: Difference between revisions
Created page with "SIP TAPI integration is made using the freely available SIPTAPI application, a software allowing to have a TAPI driver to access your PBX. http://sourceforge.net/projects/si..." |
No edit summary |
||
| Line 3: | Line 3: | ||
http://sourceforge.net/projects/siptapi/ | http://sourceforge.net/projects/siptapi/ | ||
'''IMPORTANT''' | |||
The SIP TAPI integration is made by dialing your own extension and then connecting to the destination. It is important the “Recover VM messages dialing your own same number” is set to No. The following example has been made using version 0.2.13. | The SIP TAPI integration is made by dialing your own extension and then connecting to the destination. It is important the “Recover VM messages dialing your own same number” is set to No. The following example has been made using version 0.2.13. | ||
| Line 10: | Line 10: | ||
===== On 32bit Windows ===== | ===== On 32bit Windows ===== | ||
# Copy siptapi.tsp from 32bit folder into your Windows system32 directory (usually C:\Windows\System32) | |||
# Install and configure SIPTAPI using the telephony options from control panel | |||
[[file:spitapi1.png|400px]] | [[file:spitapi1.png|400px]] | ||
| Line 17: | Line 17: | ||
===== On 64bit Windows ===== | ===== On 64bit Windows ===== | ||
# Copy siptapi.tsp from 64bit folder into your Windows system32 directory (usually C:\Windows\System32). This gives you full TAPI support with 64 and 32bit TAPI applications | |||
# If you want to configure SIPTAPI not only from the telephony control panel and from 64bit applications, but also from 32bit applications, copy the 32bit siptapi.tsp from 32bit folder into your WoW64 directory (usually C:\Windows\SysWow64) | |||
# Install and configure SIPTAPI using the telephony options from control panel | |||
Open Control Panel and click on the Phone and Modem Option | Open Control Panel and click on the Phone and Modem Option | ||
Revision as of 09:48, 20 February 2017
SIP TAPI integration is made using the freely available SIPTAPI application, a software allowing to have a TAPI driver to access your PBX.
http://sourceforge.net/projects/siptapi/
IMPORTANT The SIP TAPI integration is made by dialing your own extension and then connecting to the destination. It is important the “Recover VM messages dialing your own same number” is set to No. The following example has been made using version 0.2.13.
Download and uncompress the zip package
On 32bit Windows
- Copy siptapi.tsp from 32bit folder into your Windows system32 directory (usually C:\Windows\System32)
- Install and configure SIPTAPI using the telephony options from control panel
On 64bit Windows
- Copy siptapi.tsp from 64bit folder into your Windows system32 directory (usually C:\Windows\System32). This gives you full TAPI support with 64 and 32bit TAPI applications
- If you want to configure SIPTAPI not only from the telephony control panel and from 64bit applications, but also from 32bit applications, copy the 32bit siptapi.tsp from 32bit folder into your WoW64 directory (usually C:\Windows\SysWow64)
- Install and configure SIPTAPI using the telephony options from control panel
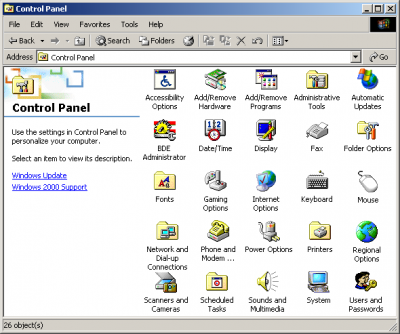
Open Control Panel and click on the Phone and Modem Option
In the Advanced tab add a new Provider
Select “SIP TAPI Service Provider...” and press Add.
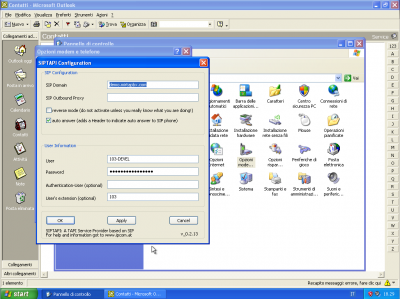
Configure it by entering the PBX host address, the extension and the password
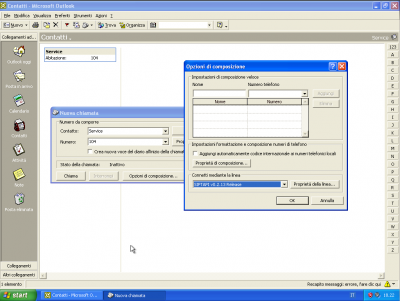
Open you TAPI compatible application, like Outlook and dial any contact. You need to configure the application to dial using the SIPTAPI.


