Configuring a service using ChatGPT
You are now able to "talk" with your PBX and ask for info, recover information on the internet or trigger destinations in special case. Let's see some useful configuration.
ChatGPT integration
The integration with ChatGPT is done using a custom destination named "Talk with a Generative Artificial Intelligence".
Providing information
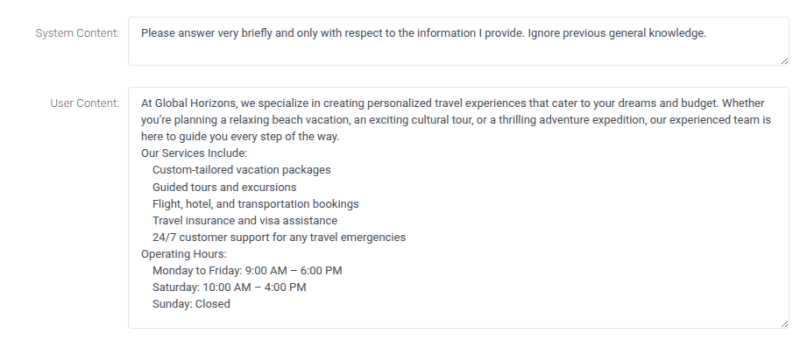
ChatGPT is really helpful for providing information to the callers. There are mainly two big text boxes for providing the knowledge to ChatGPT. The first one, "System Content" describe how the ChatGPT must behave, if it needs to be brief, if it can provide general information based on its knowledge or only the one we are providing in the object. This is really important if you don't want your callers to ask ChatGPT questions not relevant about your business.
The other box, "User Content" allows you to upload all the information you want your ChatGPT to know. Let's see an example:
The third box available, "Assistant Content" is not really useful and is what the ChatGPT has already told you. It is usually left empty
Testing
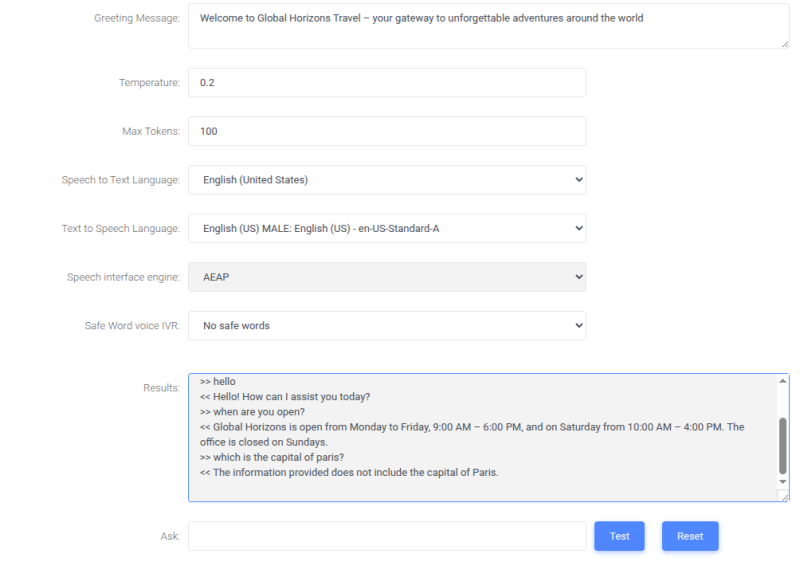
Before going live, connecting the Custom Destination to a DID or IVR menu entry, you can test the configuration in the bottom text box, using text.
Verifying the talk
You can verify any talk your callers had with ChatGPT by checking the IA Logs from Status/Call History. If you want to get a recording of the ChatGPT conversation, you need to activate the recording by forcing it to record "early audio" or "force before answering". The call is not bridged. You can also receive the conversation by email at the end of each ChatGPT interaction. Don't forget to create the email template for it.
Putting the IA at work
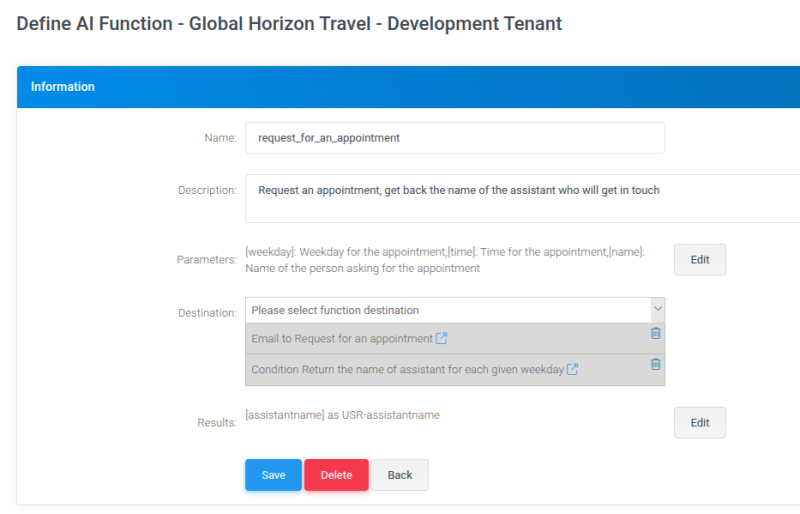
Talking and giving information for the IA is an easy job, but let's put the IA to do some real work. In this case we want to use the IA to book an appointment, so when an appointment is requested, we are going to instruct the IA to ask for the weekday and the time for the appointment. This is the result of the configuration:
[
    {
        "name": "request_for_an_appointment",
        "description": "Request an appointment, get back the name of the assistant who will get in touch",
        "parameters": {
            "type": "object",
            "properties": {
                "weekday": {
                    "type": "string",
                    "description": "Weekday for the appointment"
                },
                "time": {
                    "type": "string",
                    "description": "Time for the appointment"
                },
                "name": {
                    "type": "string",
                    "description": "Name of the person asking for the appointment"
                }
            },
            "required": [
                "weekday",
                "time",
                "name"
            ]
        }
    }
]
This configuration is made by pressing the "Function" edit icon. It is important to describe each function, so the IA can pick the correct one based on the requests from the caller. It is of the same importance to describe each of the parameters. The names of the parameters, "name", "weekday" and "time" will be available in Asterisk as variables like USR-name, USR-weekday and USR-time, so you can use them in your configuration.
Using the data
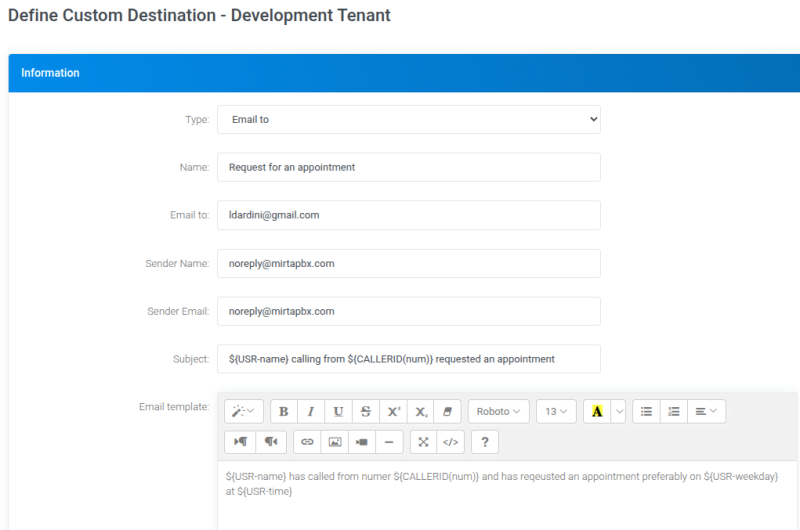
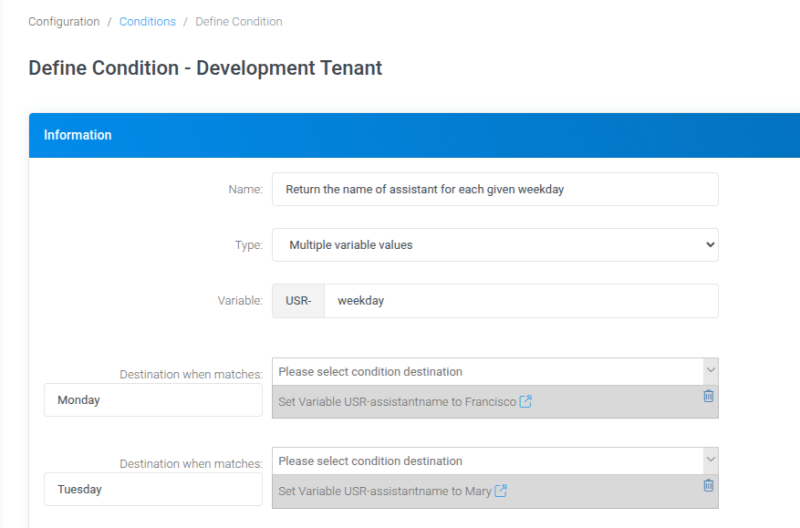
The data provided to the IA can be used, in this case an email is sent and the name of the agent getting back to the caller is recovered from a condition
